With ECon and EDT relating to Store 98, it is recommended that Class Codes be setup in QuickBooks so that you can differentiate sales within your QuickBooks.
NOTE: If you are already a multi-store environment, you will only need to set up Store 98.
Follow the steps below to setup Class Codes for both QuickBooks Desktop and QuickBooks Online:
QuickBooks Desktop
First, in QuickBooks® Desktop:
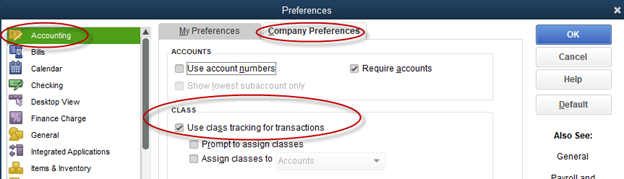
- Go to Edit > Preferences > Accounting > Company Preferences.
- Check off Use Class Tracking for Transactions.
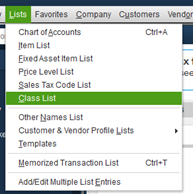
- Next you will need to go to Lists > Class List.
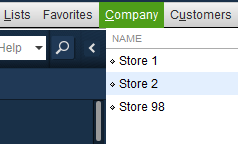
- And Add the stores here, as seen in the image below:
Next, back in The Edge:
- Navigate to Administrative > QuickBooks > Set Up QuickBooks Integration.
- Go to the Stores tab and link the newly created Class Codes.
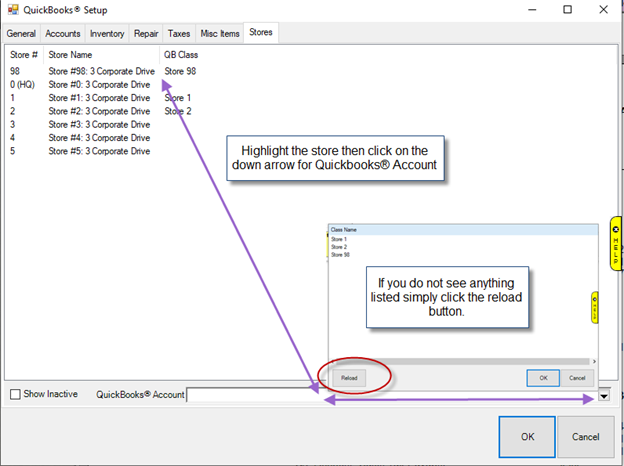
- Click OK to save your changes.
QuickBooks Online
First, in QuickBooks Online:
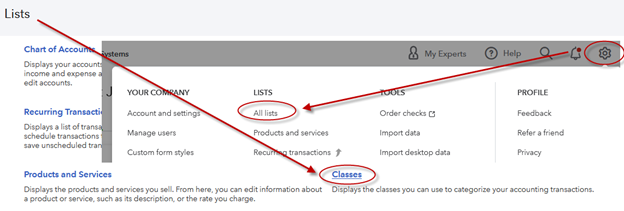
- Go to Settings > All Lists > Classes.
Next, back in The Edge:
- Navigate to Administrative > QuickBooks > Set Up QuickBooks Integration.
- Go to the Stores tab and link the newly created Class Codes.
- Click OK to save your changes.
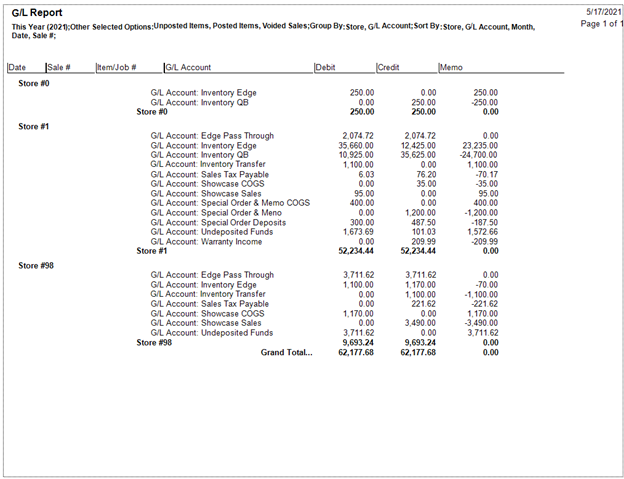
Sample G/L Report