You can use different email settings for different purposes.
To configure email settings for customer mailings that are different from those of receipts or notifications:
- Navigate to Administrative > Email Settings > Notifications. The Outbound Email Server Settings window will appear.
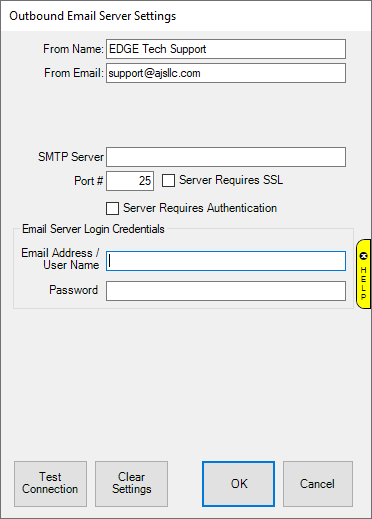
Fields and options to complete in the Outbound Email Server Settings window include:
|
From Name
|
The name that you want to appear as the sender of the receipt. This will probably be your store name. This also serves as the “reply to” email address.
|
|
From Email
|
The email address from which the receipt is being sent. This will be your store email account.
|
|
SMTP Server*
|
The outbound server as provided by your email provider. It will probably be an SMTP account.
|
|
Port #*
|
The port number with which your email interacts.
|
|
Server Requires SSL*
|
Whether the outgoing server requires a secure socket layer.
|
|
Server Requires Authentication*
|
Whether the outgoing server requires authentication.
|
|
User ID*
|
The email account’s user ID.
|
|
Password*
|
The password for the email account.
|
|
Test Connection
|
Sends a ping though the system to make sure settings are correct.
|
|
Clear Settings
|
Allows you to clear email settings, which will effectively disable automated emails
|
- Complete these fields with user and server settings (SMTP) provided by your email provider.
- Select Test Connection to have a test email sent to you to verify set up is correct.
- Click OK.