To create a new Dashboard:
- Click Dashboards > Add.
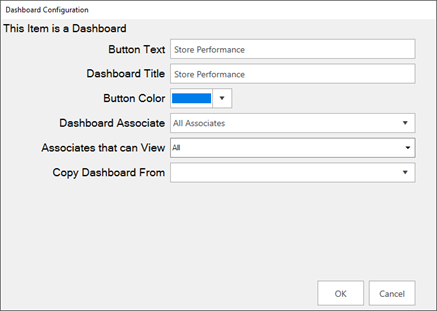
|
Button Text
|
Label for the button; each Dashboard will show as its own button in the menu.
|
|
Dashboard Title
|
Title that displays at top of Dashboard.
|
|
Button Color
|
Color for this Dashboard’s button.
|
|
Dashboard Associate
|
Associate(s) that this Dashboard’s data is based on.
|
|
Associates that can View
|
Associate(s) that have permission to view this Dashboard.
|
|
Copy Dashboard From
|
Copy initial Dashboard setup from an existing one.
|
- All fields, with the exception of Copy Dashboard From, are required. Fill them in and click OK. The Dashboard Management window will appear.
- This window controls the positioning of the buttons in the hierarchy. See the Organizing Dashboards page for more information. For now, click Save/Close in the lower right.
- Your new Dashboard button will appear on the left.

- Click on the button you just created. The blank dashboard will load.
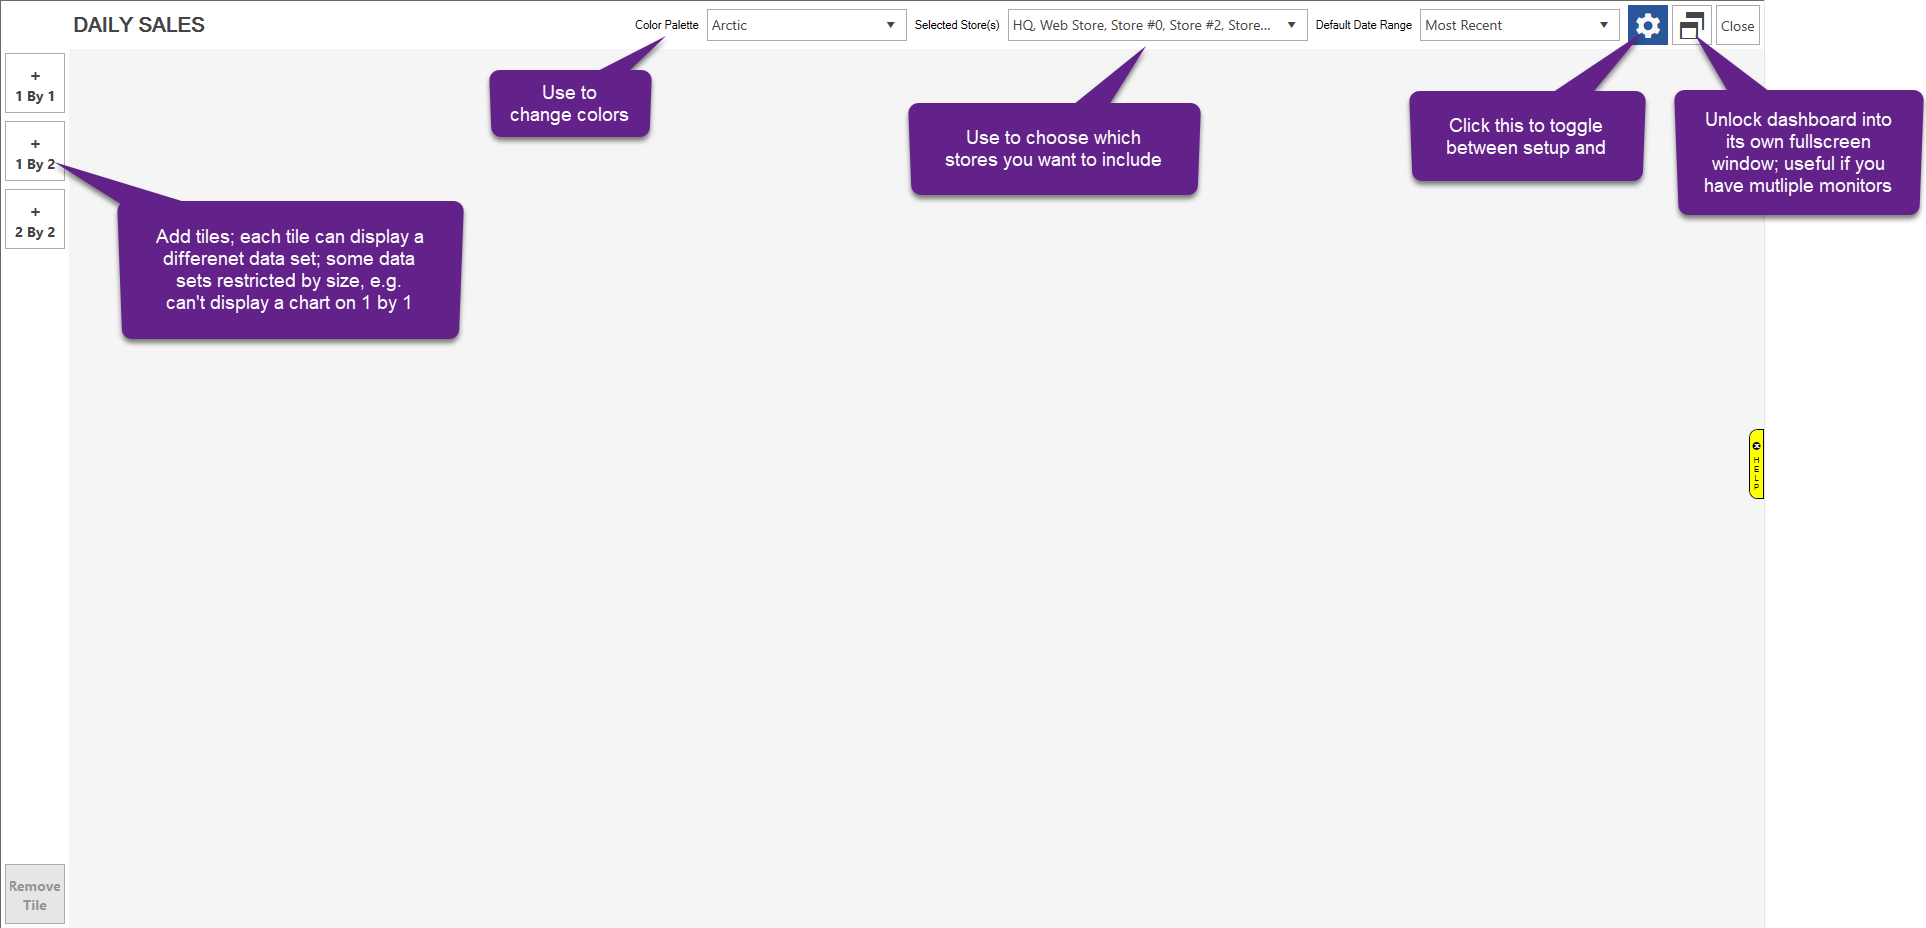
- Click 2 by 2 to create your first tile, then click the Gear icon on the tile to enter setup.
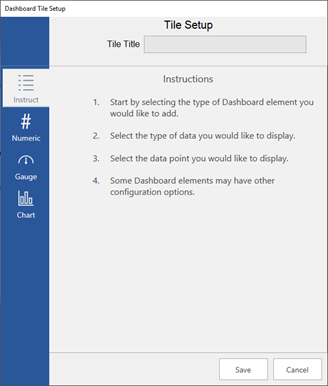
- There are four types of Dashboards:
|
Numeric
|
Displays a number; recommended for use on 1 by 1 tiles
|
|
Gauge
|
Creates a gauge with goals; useful for tracking progress
|
|
Chart
|
Displays a pie, bar, or doughnut chart; best used with 2 by 2 tiles
|
|
List View
|
Displays a list of actionable records such as tasks, customers, appointments, etc.
|
- For this example, click on Chart.
- Use the drop-downs to select:
a. Data Set: Sales Data
b. Data Value to Display: # Sales by Associate
c. Chart Type: Pie Chart
- The Tile Title will automatically fill in to match selected data, but you can change it if you like.
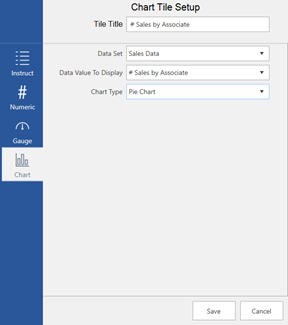
- Click Save to add this tile.
- Repeat to add as many additional tiles as you like.
- If you make a mistake or want to delete a tile, use the Remove Tile button.
- When done, click the Gear icon in the top right to toggle out of configuration mode.
Note: In a multi-store environment, if you setup the Dashboard to view All Stores' data, you can later on select specific stores to view just their data. If you setup the Dashboard as a specific store, you will only be able to view that one store.