After installation, TPW will be available from Windows. By opening the TPW interface, you can enter settings for uploads. After configuration, the upload can run in the absence of the interface on a schedule using Windows Task Scheduler.
For more about Windows scheduled tasks, see the tip sheet entitled Setting Up a Windows Task. The scheduled upload is discussed in a later section.
NOTE: Configuration of the TPW function is only necessary on one PC, preferably the server where The Edge database is stored locally. To configure EdgeTPW.exe, The Edge database path must be configured as described below.
To configure the website upload:
- Run the EdgeTPW.exe file with a command line argument of –I (for interactive). More specifically: from a command line, for example, type C:\Program Files (x86)\ajsllc\Edge\EdgeTPW.exe –I.
We recommend creating a desktop shortcut to the TPW configuration.
To do so:
a. Right click anywhere on the desktop and from the context menu, select New > Shortcut. The Create Shortcut window will appear.
b. In the Type the Location of the Item field, for the default location, enter C:\Program Files (x86)\ajsllc\edge\EdgeTPW.exe –I.
c. Select Next. You will be prompted to name the shortcut.
d. Enter a meaningful name such as Edge TPW Config and select Finish.
- When you run TPW.exe with the interactive switch, the TPW interface will open with the General tab open.
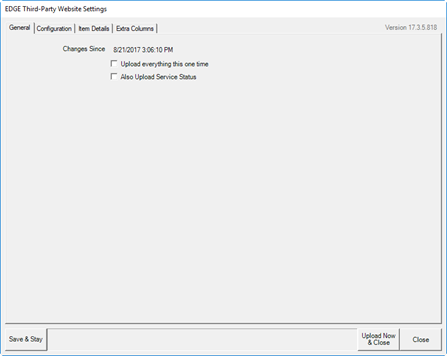
Options on the General tab include:
|
Changes Since
|
Indicates how far back to look for new items to upload. This is managed automatically when running on a schedule.
|
|
Upload everything this one time
|
Whether to upload the complete contents of your database. Use this option the first time you upload to your website or to start over.
|
|
Always Upload Service Status
|
Indicates that the status of the service job should be provided; this is uploaded to a separate file.
|
NOTE: When uploading bulk items, for “upload all,” only items with a quantity in stock will be included. For “upload since,” any changes to the items or items quantity detail will cause an upload, even if the change does not really matter. If there is qty > 0 then the status will be “I,” otherwise the status will be “S.”
NOTE: Throughout the configuration process, you have the option to save your work by selecting Save & Stay.
- Complete these fields as desired and select the Configuration tab.
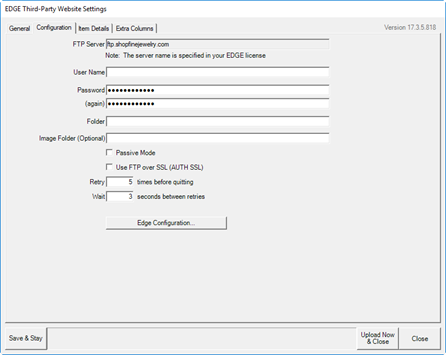
The Configuration tab contains fields to enter information necessary to access the website.
NOTE: You may need to obtain this information from your website host provider.
Fields include:
|
FTP Server
|
The address FTP server that holds your website data. It will be populated according to the information in your license.
|
|
User Name
|
The username for FTP access to your website.
|
|
Password
|
The password for FTP access to your website.
|
|
(again)
|
To ensure accuracy, you are asked to repeat your password.
|
|
Folder
|
The folder in the host FTP directory to which data should be saved.
|
|
Image Folder (Optional)
|
Optionally, you can designate a folder separate from the data folder into which images should be uploaded. The image folder, if one is entered here, will be a subfolder of the main FTP location mentioned above. For example, if the ftp is ftp://upload.com/, and a user enters a value of “photos” in the image folder, the images will be placed in ftp://upoad.com/photos.
|
|
Passive Mode
|
Whether to use passive mode for access.
|
|
Use FTP over SSL (AUTH SSL)
|
Whether your FTP site requires Secure Socket Layer authorization.
|
|
Retry times before quitting
|
How many times to attempt the transfer before allowing the process to fail.
|
|
Wait seconds between retires
|
How long to wait in between attempts.
|
|
Edge Configuration
|
Opens The Edge configuration window. Database configuration is housed there; use this to confirm the database to upload.
|
- Complete these fields as desired and select the Item Details tab.
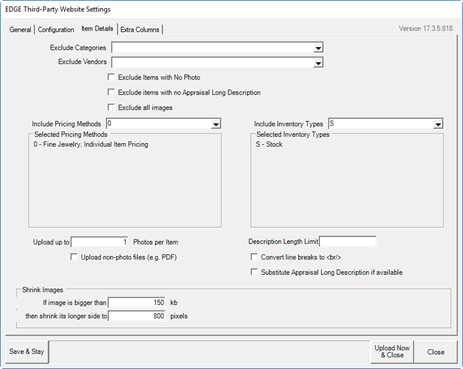
The Item Details tab allows you to filter items uploaded by vendor, pricing, and description. It also helps size images to ensure picture files aren’t too large for the web.
Fields and options in the Item Details tab include:
|
Exclude Categories
|
Allows you to filter items from the upload based on category.
|
|
Exclude Vendors
|
Allows you to filter items from the upload based on vendor.
|
|
Exclude Items with No Photo
|
Allows you to exclude items that have no photo so you don’t show an item with a blank for a picture.
|
|
Exclude Items with no Appraisal Long Description
|
Allows you to exclude items that have no long description in the appraisal record.
|
|
Exclude all images
|
Allows you to exclude images from the upload.
|
|
Include Pricing Methods
|
Allows you to select which pricing methods you want to include.
0 = Fine Jewelry, Individual item pricing (1 SKU per item) (the default)
1=General Merchandise, UPC/SKU pricing
2=Buy and sell Item by Unit of measure
3=Buy and sell by Measure Only
4= Mixed Retail Pricing.
Pricing methods 1, 2, 3, and 4 all represent forms of bulk inventory.
Notice that the selected methods are listed in the Selected Pricing Methods window below the field.
|
|
Include Inventory Types
|
Allows you to select which inventory types you want to include. By default, only stock items get uploaded. If the customer wants any other stock types uploaded they can select it from this list. All stock types are selectable from this list. Default is stock items. Inventory types are as follows:
A: Assembled
P: Take-Off
U: Custom
S: Stock
M: Memo
C: Consignment
O: Special Order
T: Trade-In
B: Built
E: Template
V: Virtual Model
I: Internet Model approved
J: Internet Model Browse not yet approved
F: Faux Model
L: Live Model.
Notice that the selected types are listed in the Selected Inventory Types window below the field.
|
|
Upload up to ____ photos per item
|
Allow this number of photos to be uploaded with each item record.
|
|
Upload non-photo files (e.g., PDF)
|
Allows you to include files associated with the record other than photo files.
|
|
Description Length Limit
|
Allows you to limit the description to fit into a specific field size on the website. The information will be cut off once it reaches the limit they enter. By default no limit is entered into TPW
|
|
Convert line breaks to <br/>
|
Ensures line breaks are read in HTML the same way there are entered in The Edge.
|
|
Substitute Appraisal Long Description if Available
|
Allows you to use the appraisal description, which may have a more detailed, official description.
|
|
If image is bigger than
|
Allows you to indicate that images over a specified size should be shrunk.
|
|
then shrink its longer side to
|
Allows you to indicate to what size images should be shrunk. Note that the size is specified according to the long side of the rectangular image.
|
NOTE: If the item is out of stock, including bulk inventory, it will be uploaded as status "Sold".
- Complete these fields as desired and select the Extra Columns tab.
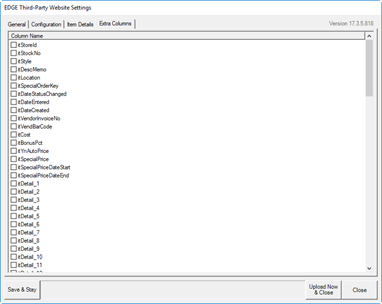
The Extra Columns tab offers a number of additional fields that can be pulled from The Edge and included in the upload.
- Select columns as desired.
- After all tabs are complete, select Save & Stay to review or, to proceed with the upload, select Upload Now & Close.