The Associate Schedule feature allows you to manage your employees’ shifts and time off.
To create a new schedule:
- Click Associate > Schedule > Admin > Modify Schedules.
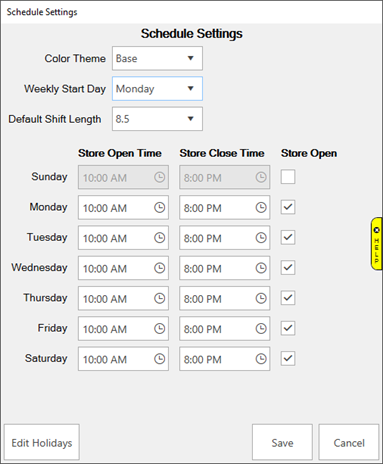
- The first time you create a schedule you will be asked to set up the Schedule Settings. This is where you set your store hours, select a color theme, and set the default shift length. You can also define any holidays that your store is closed using the Edit Holidays button.
- After completing setup click Save. This will bring you to the Schedule Management screen. Each row here represents one week. The first week is automatically created for you.

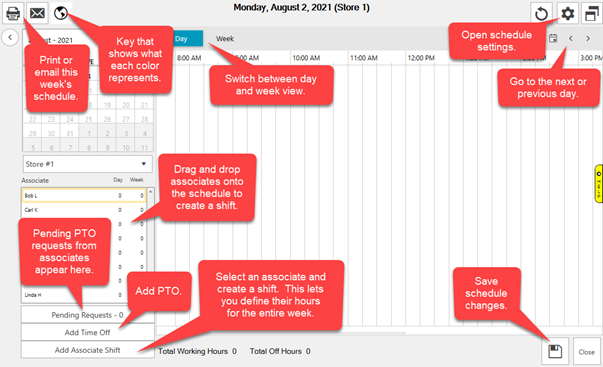
- Select the first week and click Edit. Alternatively, you can double click. This will open the Schedule screen.
 Any associate can view the schedule without needing any special permissions by clicking Associate > Schedule > See Schedule.