In addition to printing tags, The Edge offers the feature of generating and printing signage. These are signs designed to be on display along with items as opposed to poster-size signs. Such signs are generated from selections made in the Start a Sale function (see the section entitled Start a Sale) or Automatic Markdown in the Categories function (see the section entitled Categories).
NOTE: We recommend pre-perforated and colored paper stock on which to print such signs.
Sign templates can be assigned in a few ways:
- Use Administrative > Start a Sale function to put items on sale. If you choose a sign when creating the sale, signs will be generated for all items involved in the sale.
- Setup automatic markdown tables for use with Inventory Buying Tools. Each markdown tier can be assigned a sign (if appropriate) and these signs will be automatically generated when AIMS Autopilot is run.
To generate signs:
- Select Print Signage from the Inventory menu. The Signage to be Printed window will appear.
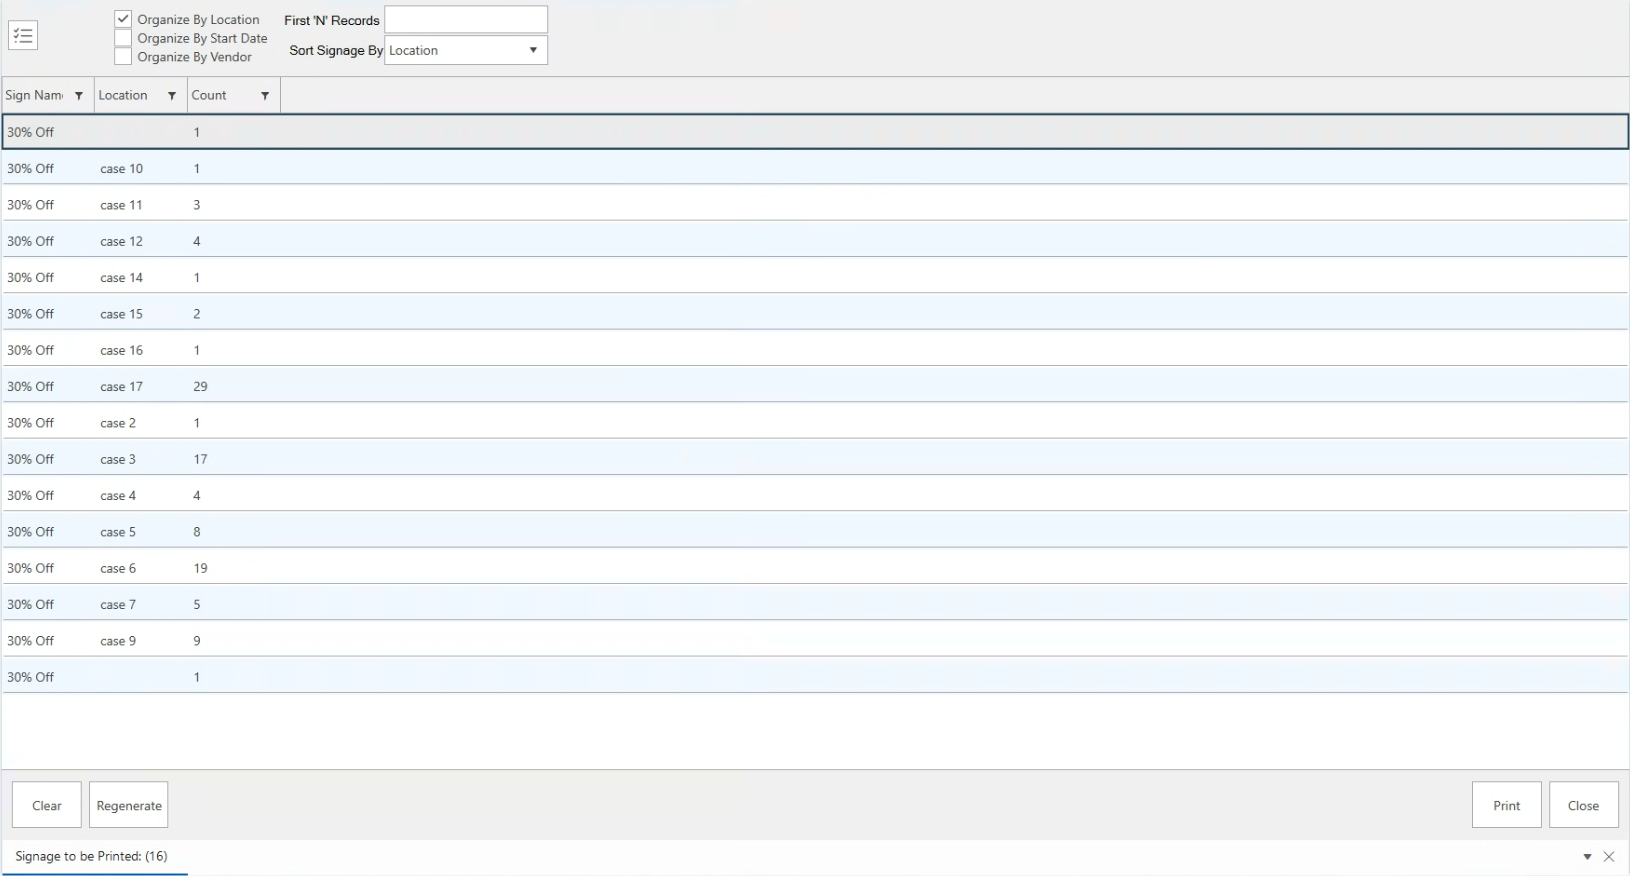
- Select the record containing the type of signage you would like to generate. You have a few options as to the order and number of signs you would like to print.
|
Organize by Location
|
Organizes the signs by the location of the included items within the store.
|
|
Organize by Start Date
|
Organizes the signs by the starting date of the event.
|
|
Organize by Vendor
|
Organizes the signs by the vendor providing the items.
|
|
First N Records
|
Allows you to indicate the number of signs to print at one time.
|
|
Sort Signage By
|
Sorts by location, item number, or old item number.
|
- To generate a preview of the signs before printing, select Print from the lower right corner of the window or double-click on the desired record. The Print Preview window will appear as follows:
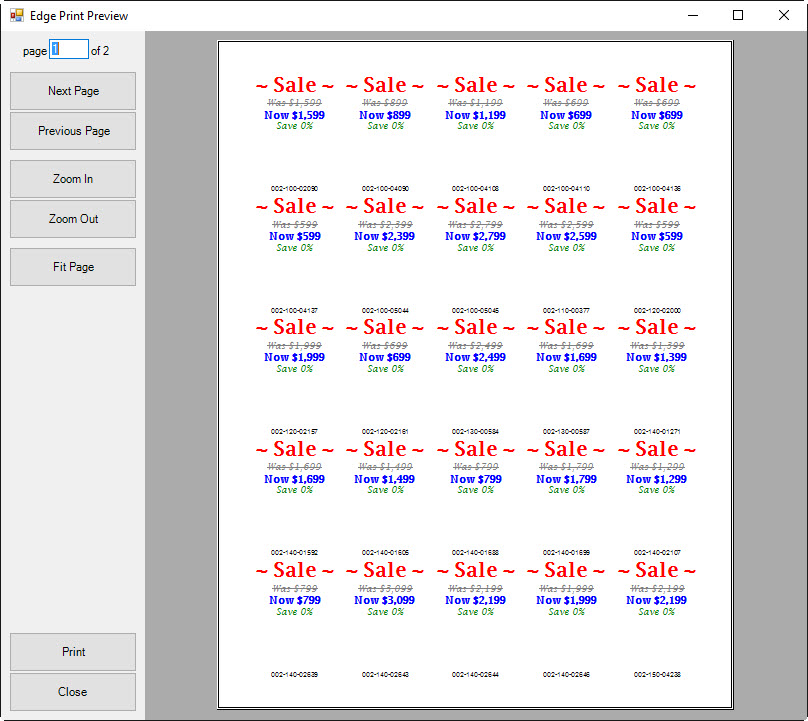
- If the layout and information are acceptable, select the Print icon on the left side of the toolbar across the top of the window. If you want to further edit the page, select the Close button. Use the arrows in the top left corner to view additional pages.
 Signs must be created as described in the section entitled Sign Formats before they can be printed.