Category Pricing Tab
Aging parameters are defined on the category record. To review and edit:
- Click Inventory > Categories > List and Edit a category.
- Click on the Pricing tab.
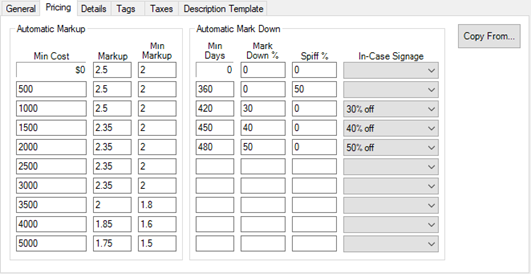
- This tab is divided into two sections: Automatic Markup and Automatic Mark Down.
|
Automatic Markup
|
This table defines suggested retail for items entered into this category based on cost ranges. These cost ranges are also used to segment your inventory for analysis on the performance reports.
|
|
Automatic Mark Down
|
This table defines the mark down, spiff, and signage applied based on the item’s age.
|
- Whether you use automatic markup or not, you should set the Min Cost ranges. These define how your inventory is segmented on the ordering and performance reports.

- For Automatic Mark Down, we recommend the following setup for diamond categories:
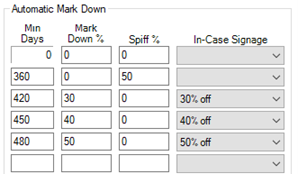
- Items between 0 – 359 days old are normally priced.
|
- Items between 360 – 419 days old receive a 50% spiff.
|
- Items between 420 – 449 days old have spiff removed and receive 30% discount.
|
- Items between 450 – 479 days old have discount increased to 40%.
|
- Items greater than 480 days old have discount increased to 50%.
|
- If using in case signage, use the drop-down to select it. For information on creating sign formats see section Sales and Signage
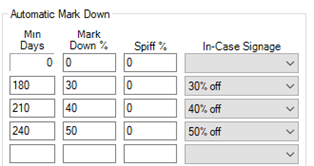
- The suggested defaults above fit diamond categories but may not be appropriate for all categories. For categories containing lower cost items, such as silver bracelets, we recommend skipping spiff and marking down faster. That might look something like this:
- Review each category and make changes where appropriate. Utilize the Copy From button (top right) to apply the pricing tables from another category to the currently selected one.
Monthly Aged Inventory Management
After reviewing and setting Automatic Mark Down tables on your categories, you can set up the monthly tools. This setup only needs to be completed once.
To setup AIMS:
- Click Inventory > Buying Tools > Monthly Aged Inventory Management.
- Click the Settings button next to Repricing.
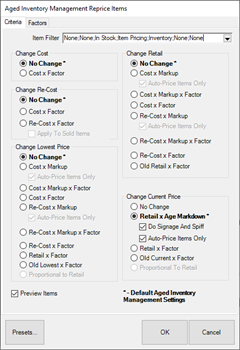
Set recommended defaults as pictured above:
|
Change Cost
|
No Change
|
|
Change Retail
|
No Change
|
|
Change Re-Cost
|
No Change
|
|
Change Lowest Price
|
No Change
|
|
Change Current Price
|
Retail x Age Markdown
Check Do Signage and Spiff
Check Auto-Price Items Only
|
|
Preview Items
|
Check this
|
- Click the Item Filter drop-down at the top, click on the Type & Status tab, and click the drop-down next to Date Entered. Enter -480 into Min and leave Max blank, then click OK.
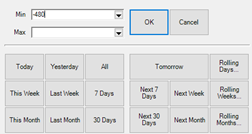
- Optionally, use the Item Details tab of the Item Filter to choose additional criteria, such as including only specific categories or vendors.
- By filtering based on date entered, only items entered in the past 480 days will be eligible for AIMS. This is recommended as most stores find they have a large amount of old items and running AIMS against the entire inventory results in an unmanageable number of items.
- Click Presets > Set as Default, then click OK to close the window.
- Click the Settings button next to Bonus Poster. Enter a Title and, optionally, a Subtitle.
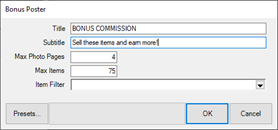
- Click Presets > Set as Default, then click OK to close the window.
- Setup is complete. Click OK to run the tools now or Cancel if you wish to run it later.