Every item entered into inventory will have a tag created for it in the tag file. It is recommended that entered items be printed in manageable quantities of 30 to 50 items. Also, when an item is returned, a new tag will be created here. Alternatively, tags can be printed from the Add Item or Edit Item window on an individual basis. The information on the tags will be controlled by choices made when setting up the category record. See the section entitled Adding a Category for more information regarding setting up the tag layout on a category.
To print a batch of tags:
- Select Print Tags from the Inventory menu. The Tags to be Printed window will appear.
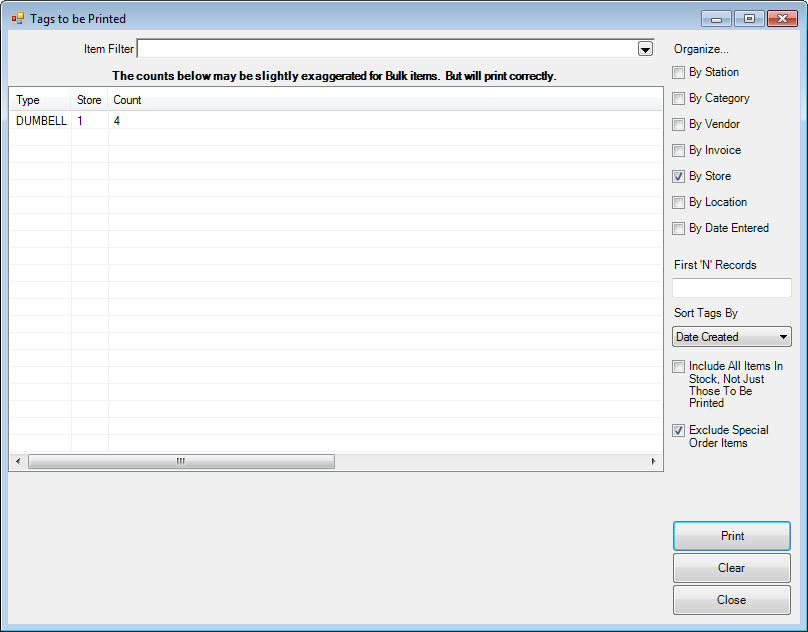
This window contains the status of the queue of tags to be printed. Before you begin, make sure your printer is loaded with a sufficient number of the correct format tags.
- Select the method(s) you would like to use to determine tag organization:
|
By Station
|
Separates the tags based upon the computer used for inventory entry. This is useful when multiple associates are entering inventory from multiple locations.
|
|
By Category
|
Separates the tags by category. This is useful if you were repricing existing inventory by category.
|
|
By Vendor
|
Separate the tags by vendor. This is useful when used in conjunction with the By Invoice option.
|
|
By Invoice
|
Separates the tags by invoice.
|
|
By Store
|
Separates the tags by store. This is useful in a multi-store environment.
|
|
By Location
|
Separates the tags by case location.
|
|
By Date Entered
|
Separates the tags based upon the date the items were entered into inventory.
|
- Highlight the row of tags you wish to print.
- Optionally, enter the number of records you would like to print at one time in the First N Records field.
- To specify the order in which tags are printed, select Sort Tags By drop-down list. This offers Date Status Changed, Item Number, Old Item Number, Date Entered, or Date Created.
NOTE: By selecting Include ALL items in stock, Not Just Those to be Printed and/or Exclude Special Order Items, you can print all tags within the system sorted per your specifications.
- Select Print. Alternatively, double-clicking on a row of tags will also cause them to start printing.
- At the conclusion of printing a row of tags, a window will be displayed showing all the tags that should have printed. This is used to clear the tags from the queue. If you need to reprint a tag, clear its checkbox before selecting OK.
- To clear tags that you do not wish to print, highlight the row and select Clear. Place a check next to the tags you wish to delete before selecting OK.
NOTE: Clear can also be used to preview tags that are waiting in queue. To do so, select a row, click Clear, and then, rather than selecting tags for deletion, cancel out.