You may notice that customers are putting things on layaway and not following up. Using the Layaway Email feature, you can locate layaways that are inactive and remind customers about them.
 This process could take some time to run. You might want to wait until off hours to run it.
To send layaway emails:
- Select Customer > Email Layaway Inactivity. The Past Due Layaway Email Filter will appear.
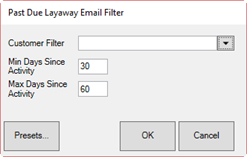
Fields and options in the Past Due Layaway Email Filter include:
|
Customer Filter
|
Returns records of layaways for the specified customers.
|
|
Min Days Since Activity
|
Returns records of layaways that haven’t had any payment or other activity for at least this number of days. For example, you only want to see records for layaways that have not had activity for at least 30 days (which is the default).
|
|
Max Days Since Activity
|
Returns records of layaways that haven’t had any payment or other activity for at most this number of days. For example, you only want to exclude records for layaways that have not had activity for more than 60 days (which is the default) so you can create a window. By running the filter for more than one window, you can assign a different email, e.g., one with more emphasis.
|
- Use the Customer Filter to specify customers to contact.
- Change minimum and maximum dates if desired.
- Select OK. The Inactive Layaways to be Emailed window will appear.
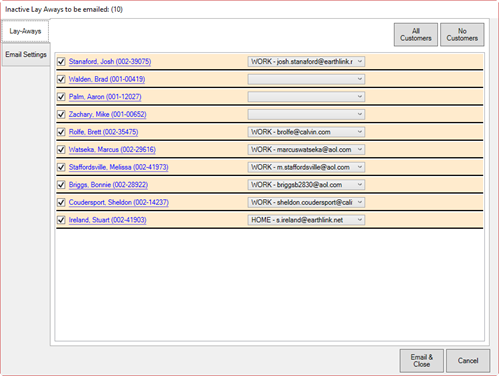
- For each record, indicate whether to include the customer in the mailing. NOTE: If there is no preferred email address, the email will be blank. Use the drop-down menu to select an email or select the customer name to add an email address.
- Select the Email Settings tab to set up the email template.
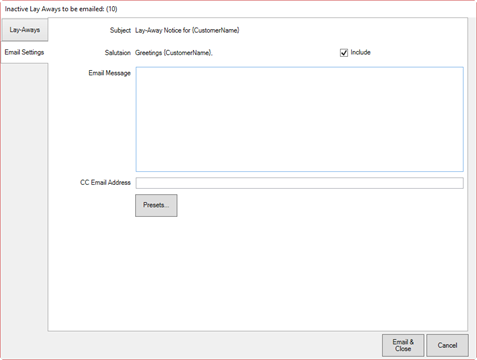
The Edge will complete the name and email address for selected recipients when the emails are sent.
- Select Include to include the salutation shown.
- Enter the message.
- Enter an additional email address if desired. Use a semicolon to separate multiple entries.
- When all selections and settings are complete, select Email & Close. The emails will be sent.
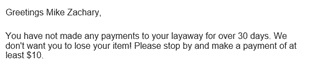
A sample layaway email might appear as follows.