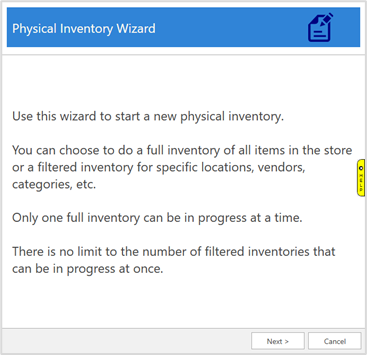
The Physical Inventory Wizard allows you to select what is being inventoried. You can do a full inventory of the entire store or a filtered inventory for selected criteria (locations, vendors, collections, categories, etc.)
Only one full inventory can be open at a time. There is no limit to the number of open filtered inventories. See FAQ section at end of this document for more information on running multiple inventories at once.
NOTE: If you are using multiple computers, follow the directions below to first START the inventory, then from the other computers click Inventory > Physical Inv. > Continue Inv.
To start an inventory:
- Click Inventory > Physical Inventory > Start New Inv. The Physical Inventory Wizard will appear. Click Next to begin.
- Choose whether doing a Full Inventory or Filtered Inventory, then click Next. Only one full inventory can be open at a time.
NOTE: If this option is greyed out, you must finish or cancel the existing inventory. There is no limit to the number of Filtered Inventories you can have open at once.
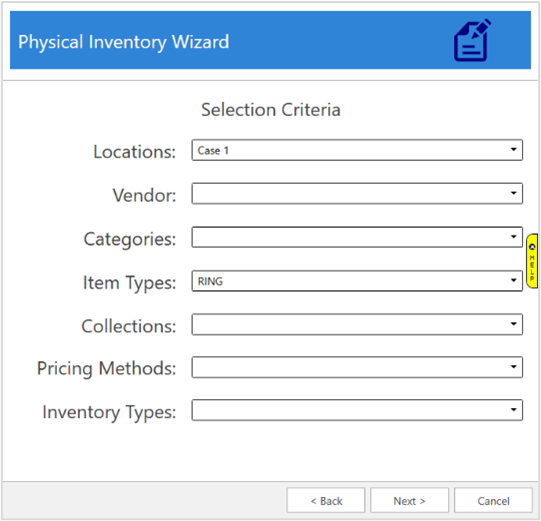
- If doing a Filtered Inventory, use the Selection Criteria drop-downs to set one or more parameters for items to be included in this inventory.
NOTE: Leaving a drop-down blank will automatically include all values.
Choose criteria and click Next. If doing a Full Inventory, this step is skipped automatically.
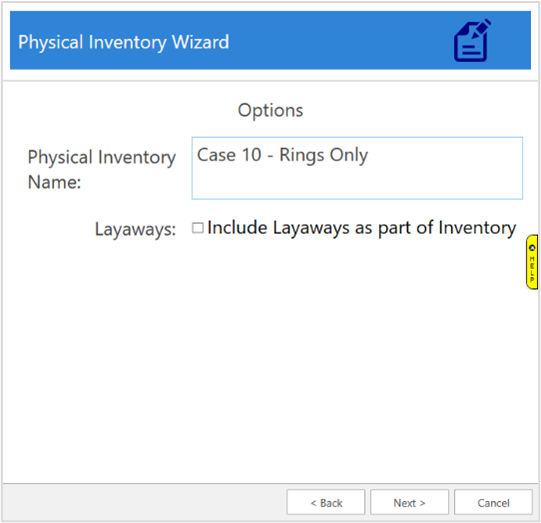
- Enter a Physical Inventory Name, choose whether Layaways should be included, then click Next.
- Click Finish. The inventory is now created, and the Scanning window will appear.
Step 1 Tutorial Video
See Step 2 - Perform the Inventory for the next step in the inventory process.