After ordering, items can be added once the shipment arrives using Receive Invoice. To do so:
- Navigate to Inventory > PO > Rcv Invoice or Inventory > Items > Add > From Invoice.
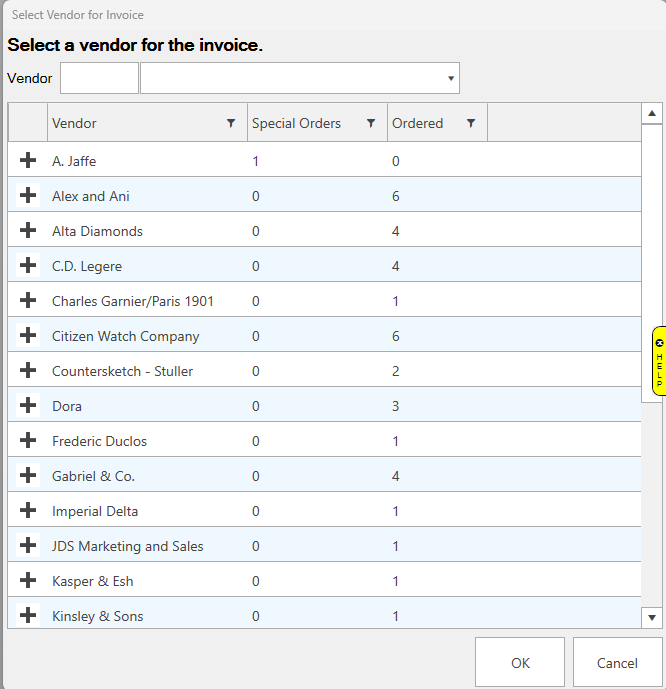
The Select a Vendor window will appear.

- Use the drop-down to select the vendor. The partial list below shows items on order and special orders.
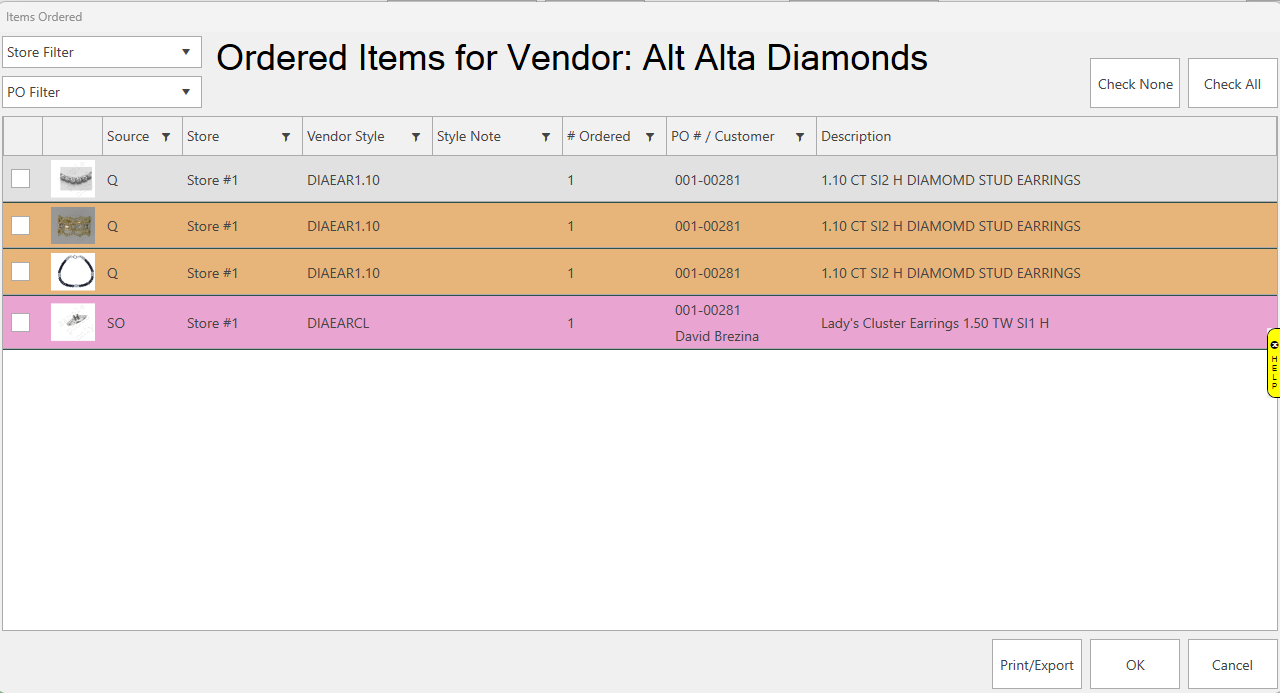
- The Items Ordered window will appear showing all ordered items for this vendor.

NOTE: These can be filtered by store and/or PO using the drop-downs in the top left.
- Check the box for items being received and click OK.
NOTE: You can get back to this window using the Items On Order button.
- If additional items were included in the shipment that were not on the original PO, you can use the Add Line button at the bottom to add them now.
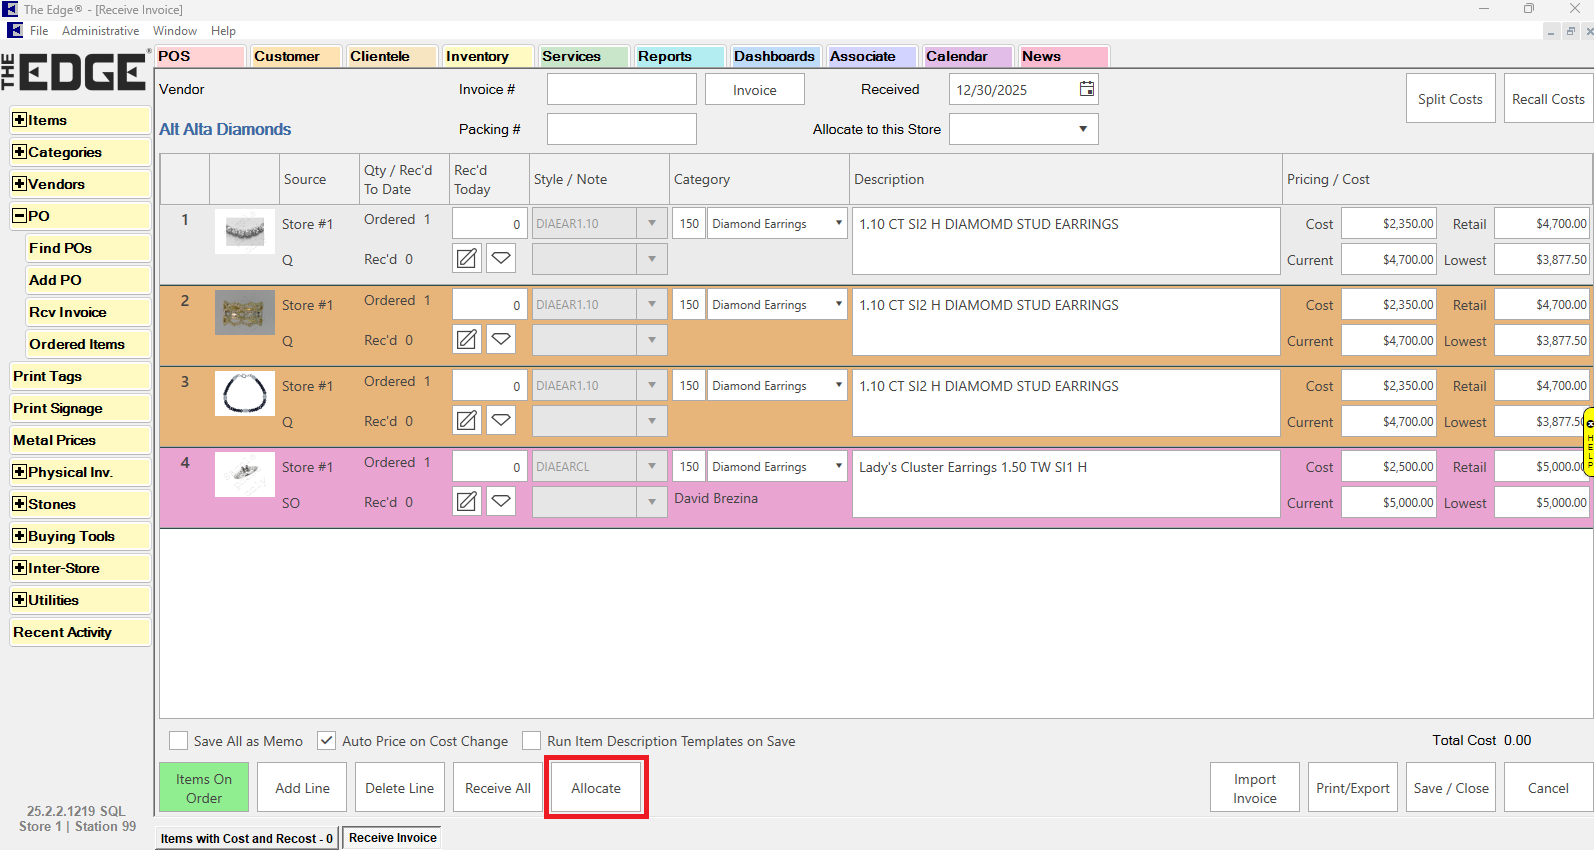
- For each line, specify the quantity received today in the Rec’d Today field. If a store number was previously assigned to this line, it will allocate to that store by default. If no store was specified, the allocate window will appear allowing you to assign quantity to one or more stores.
- To change the store allocation, click on the line and use the Allocate button at the bottom.

NOTE: The currently selected line is highlighted gray. If you are trying to change allocation, make sure you have selected the desired line before clicking Allocate.
- At the top, specify Invoice # and Date Received.
NOTE: There is also a drop-down here that can be used to allocate all unassigned items to a specific store. This will not change existing allocations.
- Click OK/Save & Close once done. The items will be added to inventory.