Once you have set the BriteCo System Options, the next step is to map Edge Values to BriteCo Values. This step is a requirement for this integration to function properly.
This section includes steps on mapping Edge Values to the default BriteCo Values. If you have many customized Edge Values, please see the following articles that cover more detailed manual mapping options, as we recommend manually going through each Edge Value and comparing to their BriteCo List and BriteCo Value for the most accurate mapping
 BriteCo will assist with your initial mapping as part of their onboarding process, but please note that you will be responsible for mapping any future Edge Values you may add for any Edge Lists by following the steps outlined in each of the following Mapping articles.
Edge Lists that require mapping:
- Lists (including custom ones) assigned to itMetalColor
- Lists assigned to field itMetalType
- Lists assigned to field stnShape
- Lists assigned to field stnIdentification
- Lists assigned to field stnEnhancement
- Stone Type
- Categories
- Watch Vendor Names
To map Edge Values to BriteCo Values:
- Navigate to Administrative > BriteCo > Map Values. The BriteCo mapping window will appear.
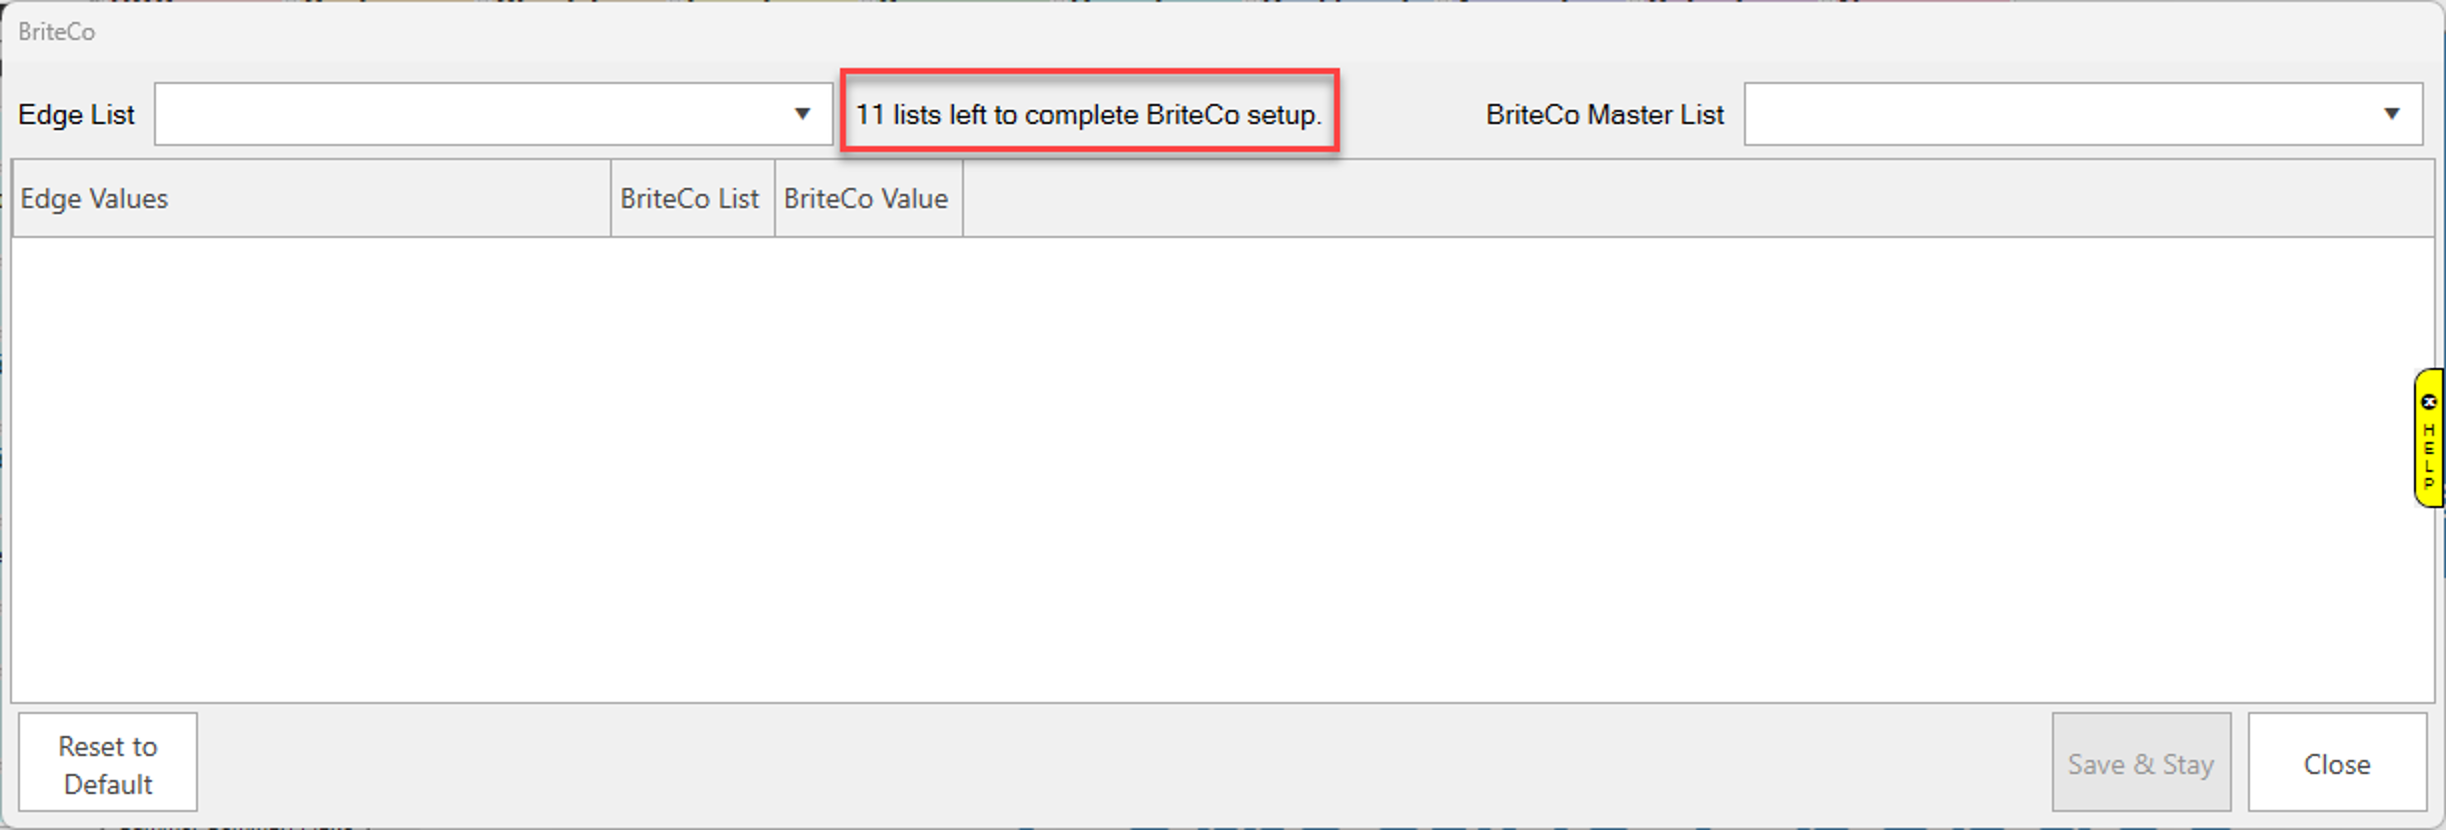
NOTE: To help guide you through the mapping process, the window will open with a starting number of lists left to map to BriteCo. This number will count down as each list is mapped successfully to let you know when you have completed mapping all required lists.
- Click the Edge List dropdown and select a list to map. In this example, we will map Watch Vendors and have selected WatchVendors from the dropdown menu. One selected, the Edge Value column will list the values to be mapped to BriteCo.
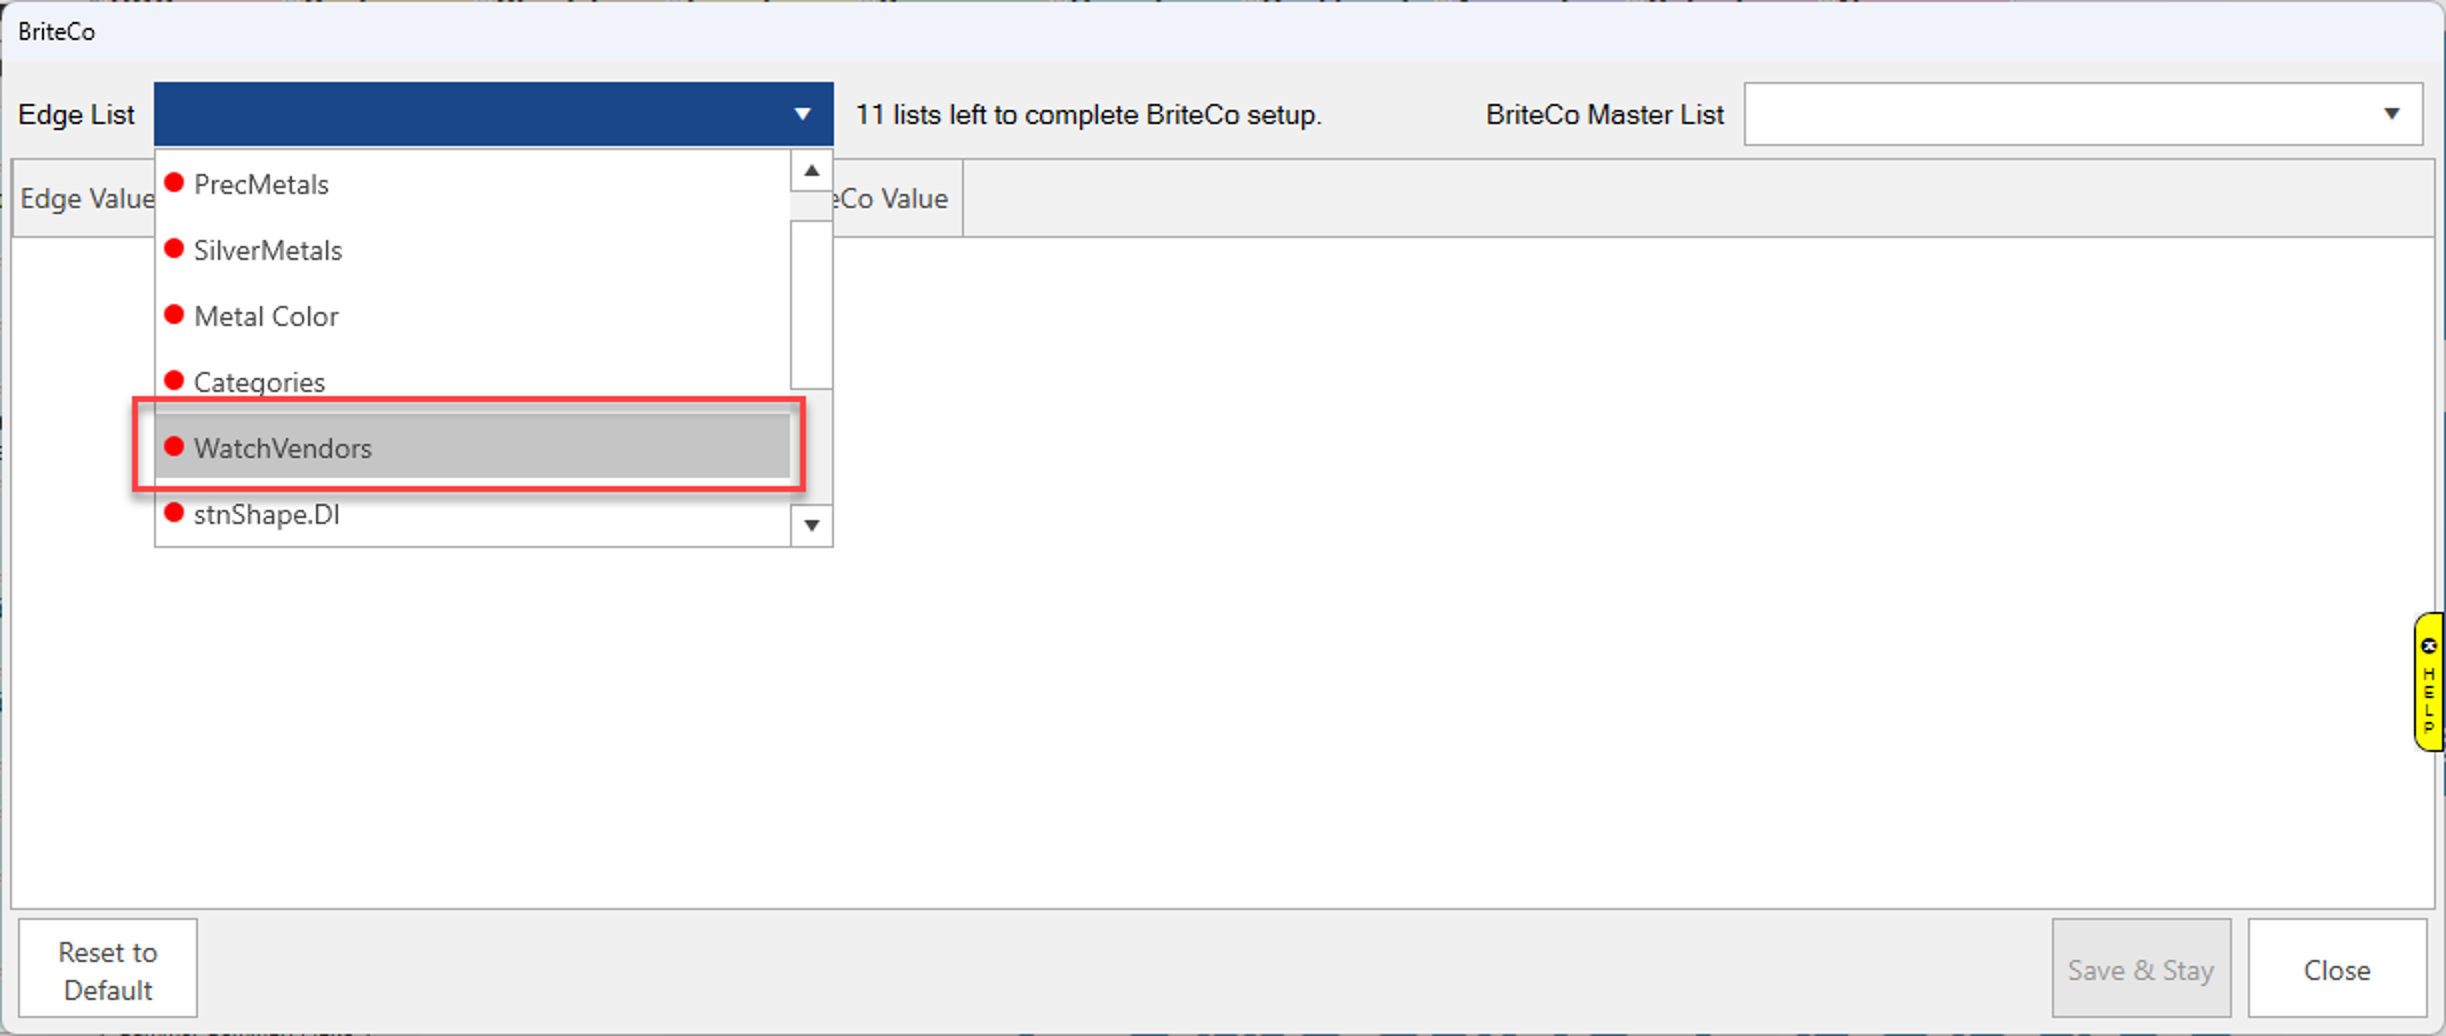
NOTE: To further help guide you through the mapping process, the Red dot indicates a list that has yet to be mapped. Once successfully mapped, this dot will change to Green, letting you know this list has been completed.
- Click the BriteCo Master List dropdown and select the corresponding list to map. Each column will automatically populate with the values to be mapped.
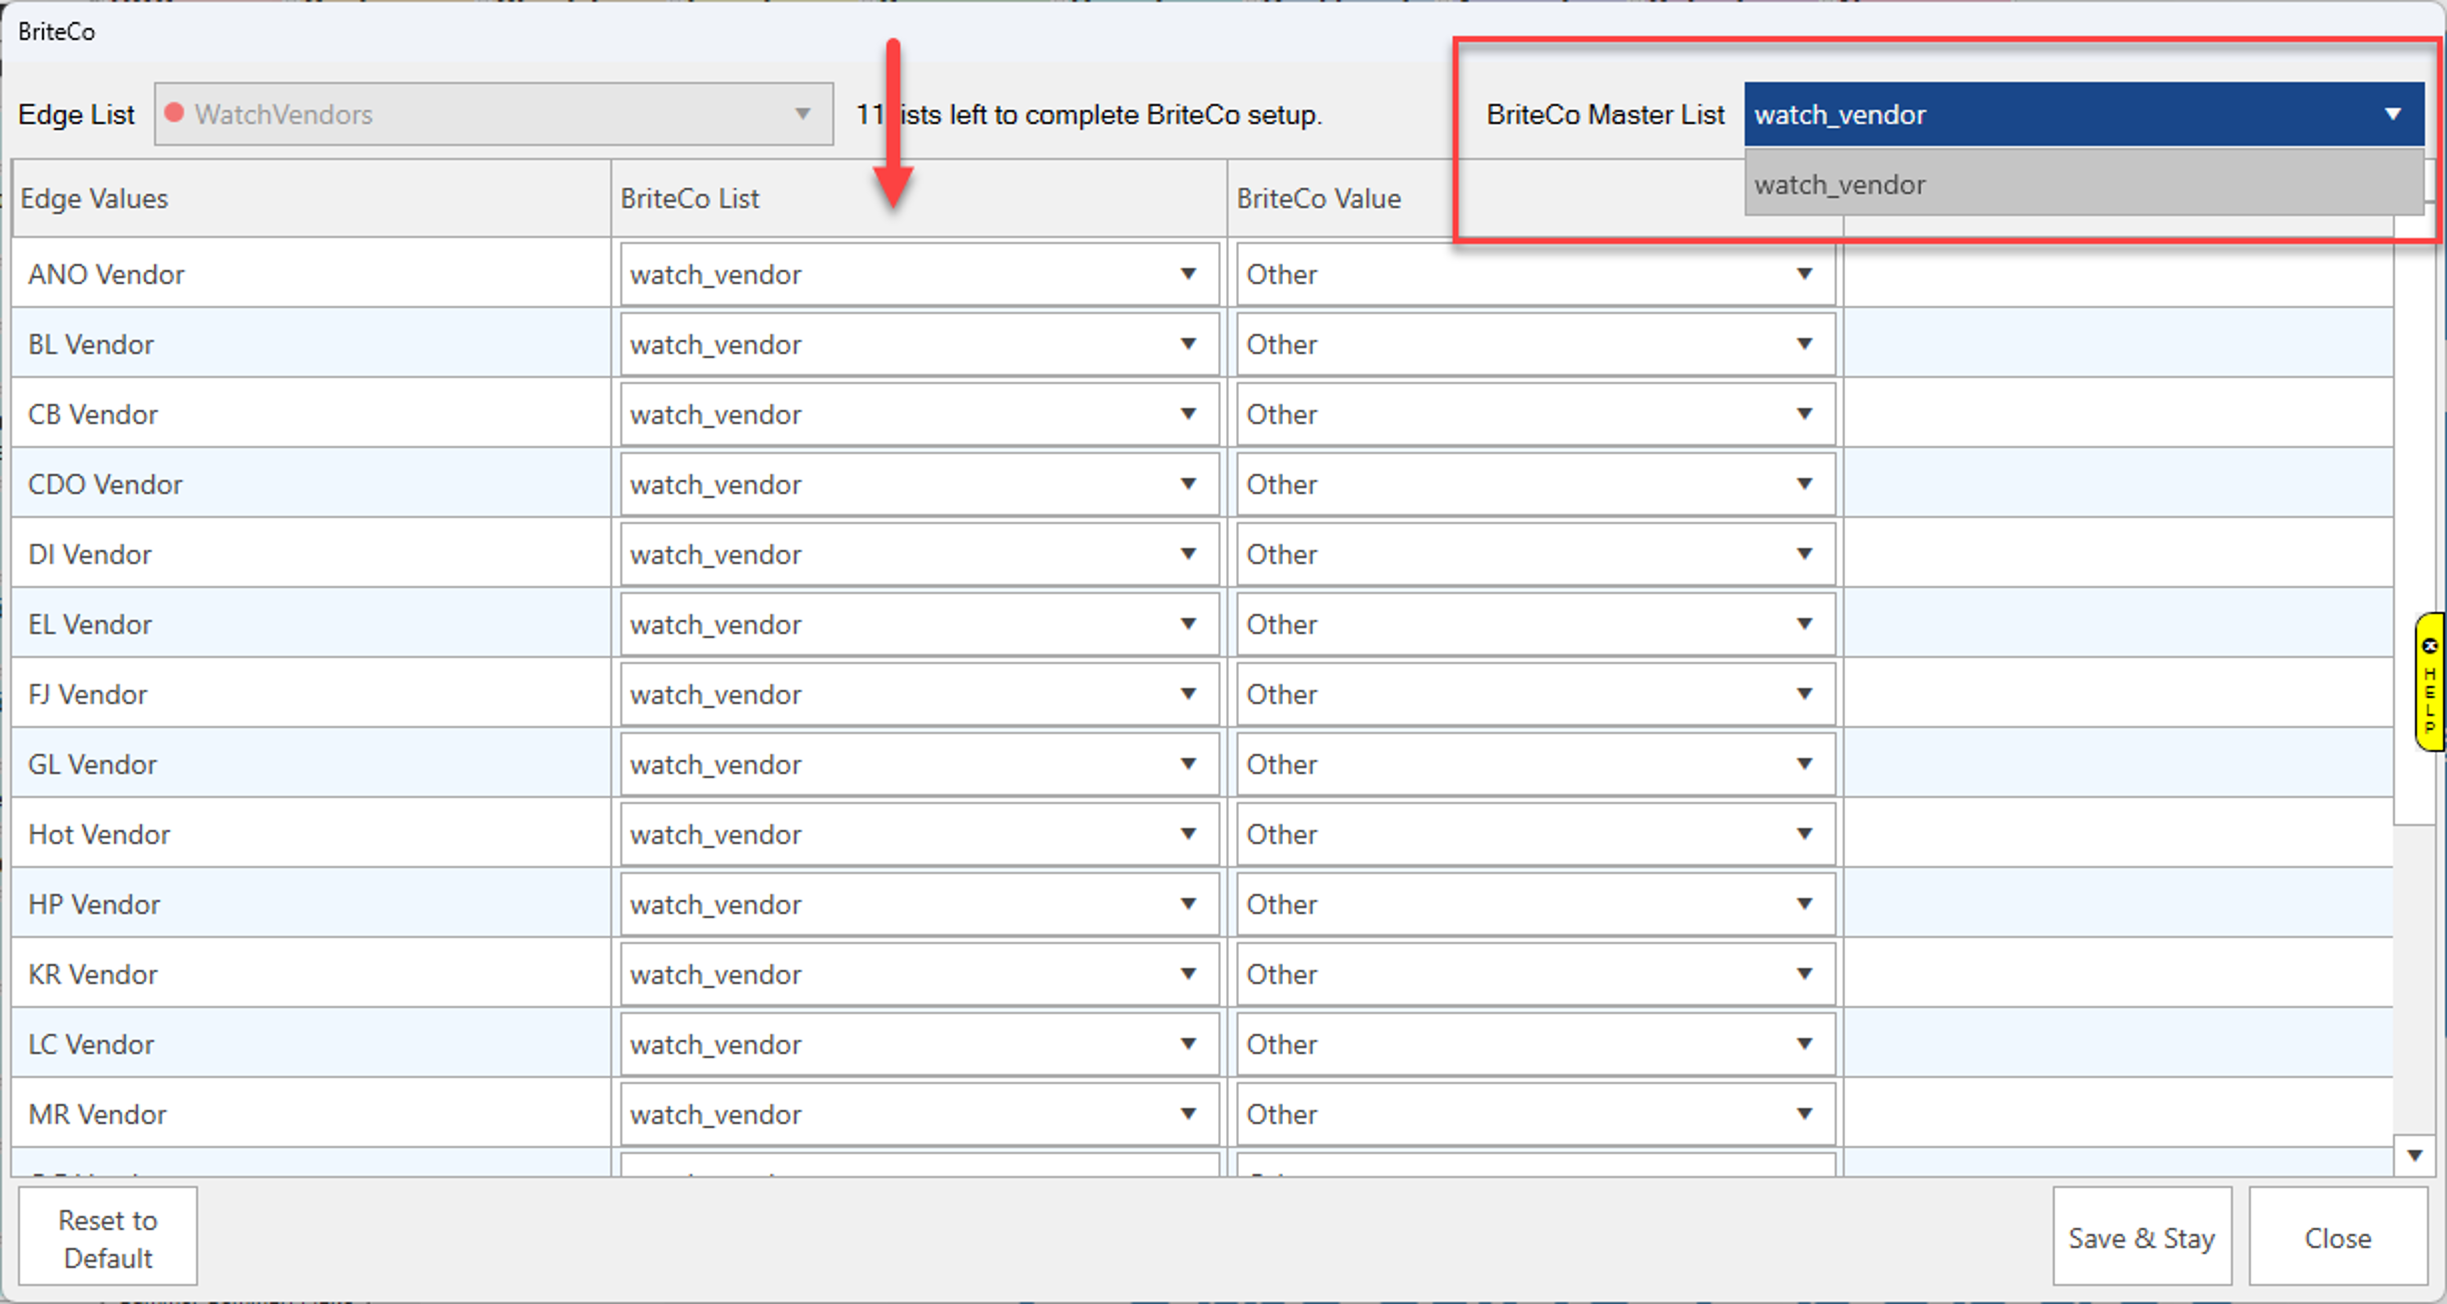
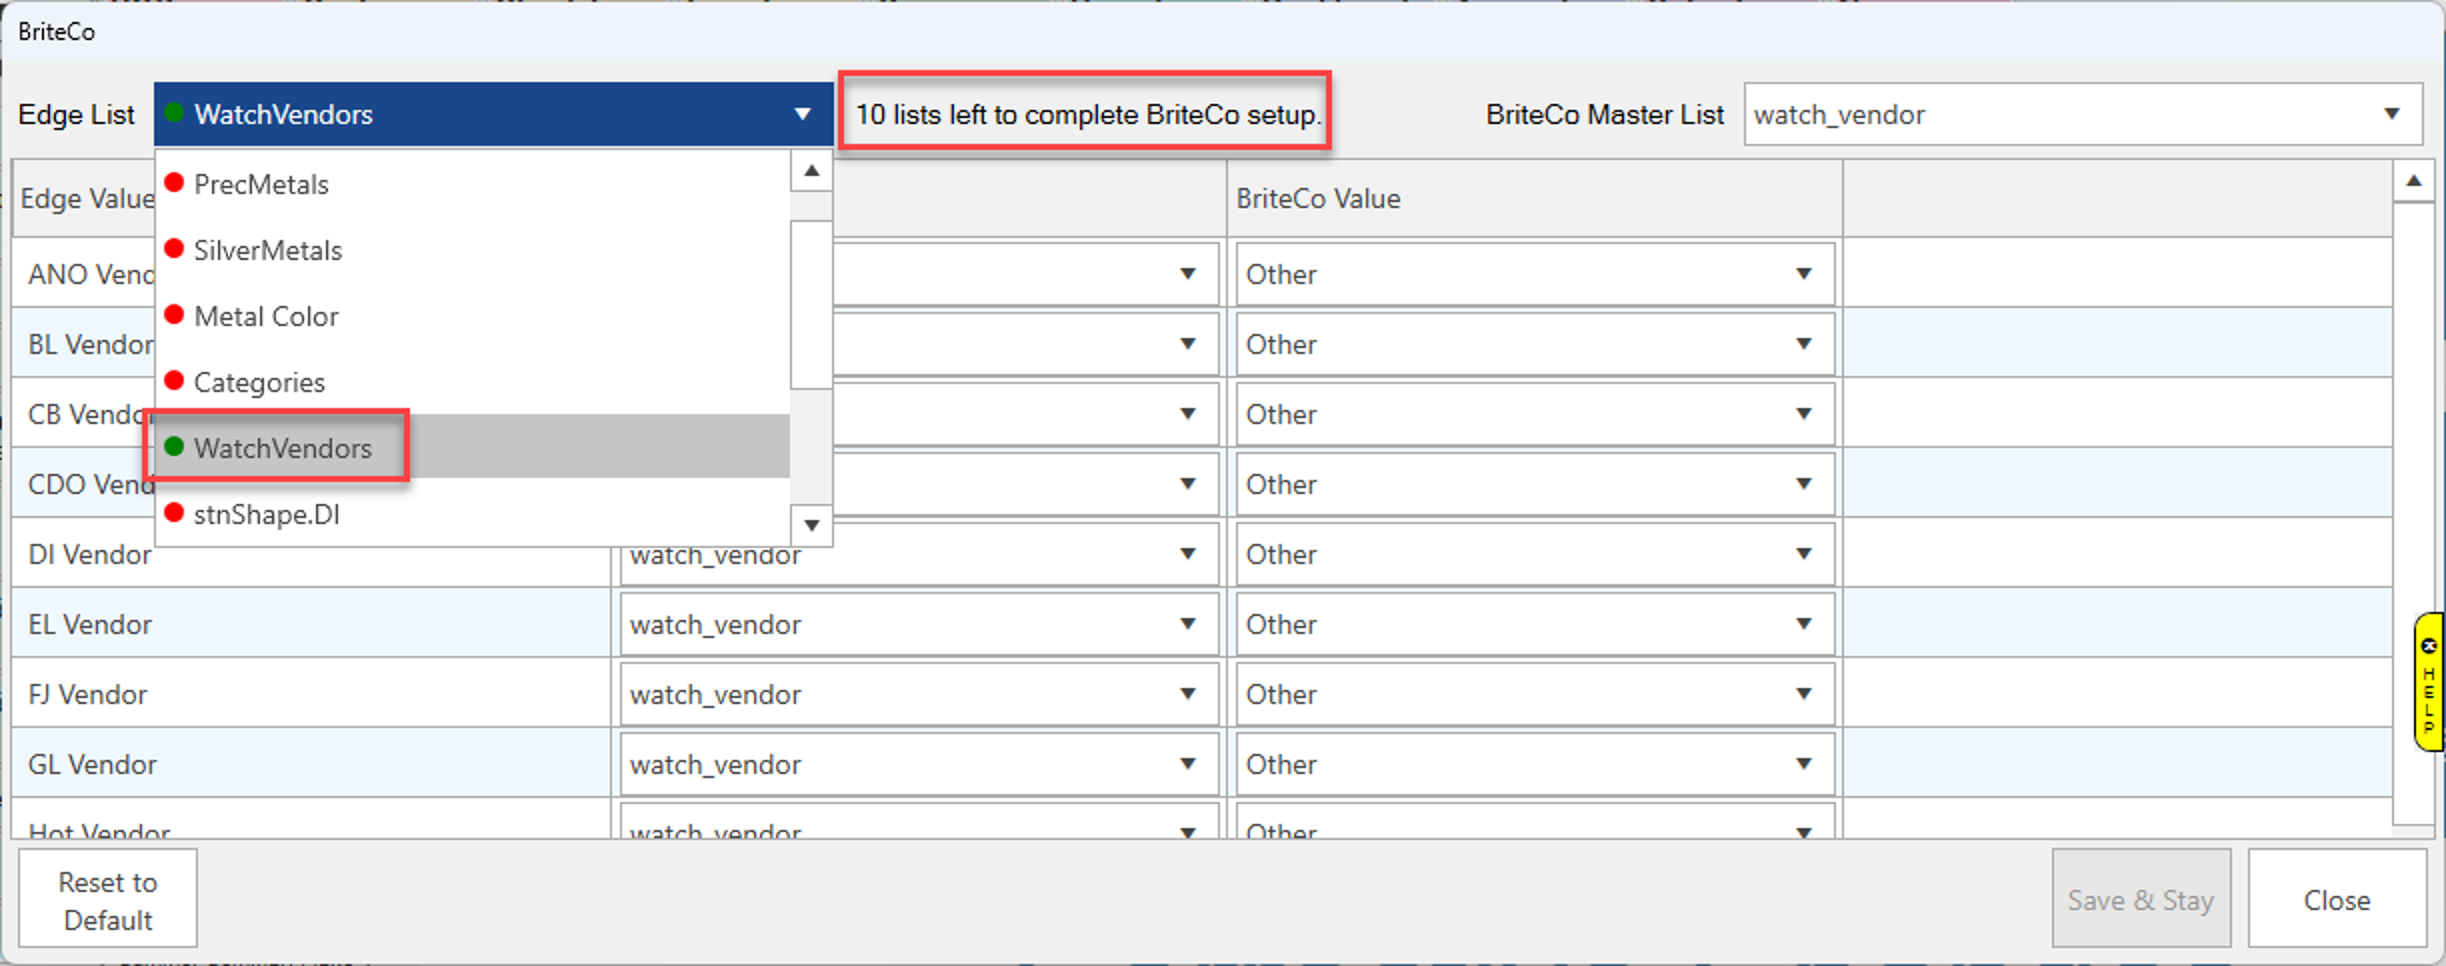
- Click Save & Stay to complete the mapping for this list, or Close if you have mapped the last required list. Once saved, you will notice the Edge List dot will turn Green and the number of lists to be mapped decrease by 1. In this example we have mapped just one required list, so the number decreased from 11 to 10 lists.
- Follow the steps above to map each required list until you have 0 lists left to complete.