The Wizard can also be used to update Repair SKUs directly rather than exporting to Excel.
To edit Repair SKUs:
- Click Administrative > Repair > Repair Task SKU Wizard.
- Choose Edit Current SKUs.
- Click the Filter drop-down to open the Select SKUs to Work With window and use either the List View or Tree View to select the Repair SKUs you wish to update, then click OK.
NOTE: Visit the Exporting section for a description of each View option.
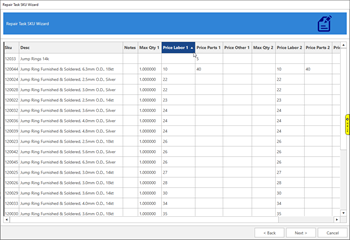
- Click Next. Your selected Repair SKUs will display in the window along with pricing and information fields.
- By default, the Repair SKUs display in numerical order. If desired, you may instead choose to sort your SKUs by an alternative method, such as price, by clicking on the corresponding column header.
- Once you have finished making your changes, click Next to apply your changes.
- Click Finish to close the Wizard.