The steps for adding notes to the newly expanded areas remain the same as when it was introduced originally with Customer Notes. The only exception is for Vendors which has been updated to include a second note type to give you more control on where your notes will appear.
For more detailed instructions on adding notes, please see the Customer Notes Revamp section for documentation and tutorial videos.
To add new Vendors notes:
- Navigate to Inventory > Vendors > Find or Add.
- Click the Notes tab.
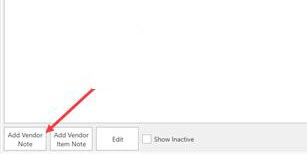
- At the bottom of the Notes window, you will see two add buttons: Add Vendor Note and Add Vendor Item Note.

-
- Add Vendor Note: Notes will ONLY appear on the Vendor record itself. Creating a pop-up note using this option means the note will only pop-up when accessing this vendor record.
- Add Vendor Item Note: Notes will appear on BOTH the Vendor record and the Item record. Creating a pop-up note using this option means the note will pop-up in POS as well as the item record.
- Click the Add option that best matches how and where you’d like your notes to appear.
- Fill out the form as desired and click Save/Close to save your note.