EDT can export inventory with their associated images, customers, wish lists, service job statuses, and sales transaction history. It contains filters that allows you to specify what is included.
The first time it is run all matching data is exported. Thereafter, it is set to run on a schedule (once a day, once an hour, once every 15 minutes, etc) and only includes new or changed data.
To configure and do your first full upload:
- Launch EDT using the EDT Interactive shortcut.
- On the General tab, check Upload everything this one time and Also Upload Service Statuses.
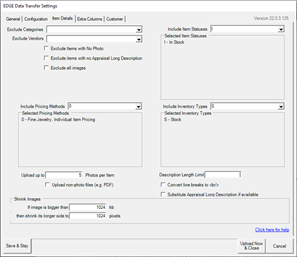
- Click on the Item Details tab. This is where you can filter what inventory data is included. For the purposes of this test we are going to leave this as default, i.e. include all in stock items.

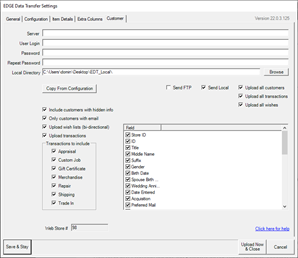
- Click on the Customer tab. Check the Upload all customers box and check all of the boxes.
NOTE: If you don’t plan on working with customers, wishlist, or sales data leave this tab blank.

- Click Upload Now & Close.
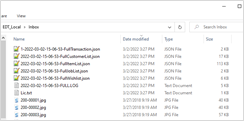
- EDT will export the data into JSON files and put them in the EDT Local folder on your desktop.
- It automatically creates Inbox and Outbox folders in the destination. Exported data will be sent to the Inbox for you to work with. Any data to import back into The Edge should be left in the Outbox and will be downloaded at this time.


- Now that the full upload is complete, you can double click EDT Run Now at any time to do a differential export and upload. Do so now.
- You will notice no JSON files were exported. This is because nothing changed in The Edge. However, the log files do get uploaded every time.
- Now launch The Edge and click Customer > Find to search for and edit customer ‘Bill Bagwell’.
- Make a change, such as adding a middle initial or modifying the name, then click OK / Save & Close.
- Double click EDT Run Now and you will see one new JSON file containing the customer change you just made appear in the Inbox.